Getting started
Create your first Omago agent, test it, and go live in minutes.
Omago is an AI agent that answers customer questions on your website, WhatsApp, and Telegram around the clock, using your own business content as its knowledge base. This guide walks you through creating your first agent, testing it, and publishing it live.
Create your first agent
- Click Agents in the left sidebar.
- Click Create.
- Step 1 — Basics: name your agent, optionally pick a prompt template, and attach or create a knowledge base.
- Step 2 — Select Pages (only shown if you added a website URL): choose which crawled pages to use.
- Step 3 — Configure & Create: write the system prompt, set the widget color and theme, and add a welcome message, then click Create.
You don't need a knowledge base to finish this wizard — if the attachment fails or you skip it, the agent is still created, and you can attach knowledge bases later from the Playground.
After you click Create, you land on the agent's Playground.
Add your business basics
Give the agent something to answer from before you test it.
- From the agent, go to Playground.
- Enable Knowledge Bases and click Add KB to attach one, or create a new knowledge base first (Knowledge Base in the sidebar → Create Knowledge Base) by crawling your website or uploading text, Q&A, or files (.txt/.pdf/.docx/.csv/.xlsx/.json).
- Set a priority for each attached knowledge base (0–10, higher is searched first), and a weight if you attach more than one.
Knowledge base changes apply immediately to live chat — they are not held as a draft the way prompt edits are.
Test before going live
- Open the agent's Playground.
- Type into the sandbox chat on the right. This sandbox is not saved to your logs, so you can experiment freely.
- Adjust the System Prompt on the left — this defines your agent's personality, tone, and behavior — and re-test in the sandbox.
- Optionally set the Response Language (default
auto, or force English, Traditional Chinese, Simplified Chinese, Japanese, or Korean). - Turn on Show Sources if you want the agent to cite the knowledge base passages it used.
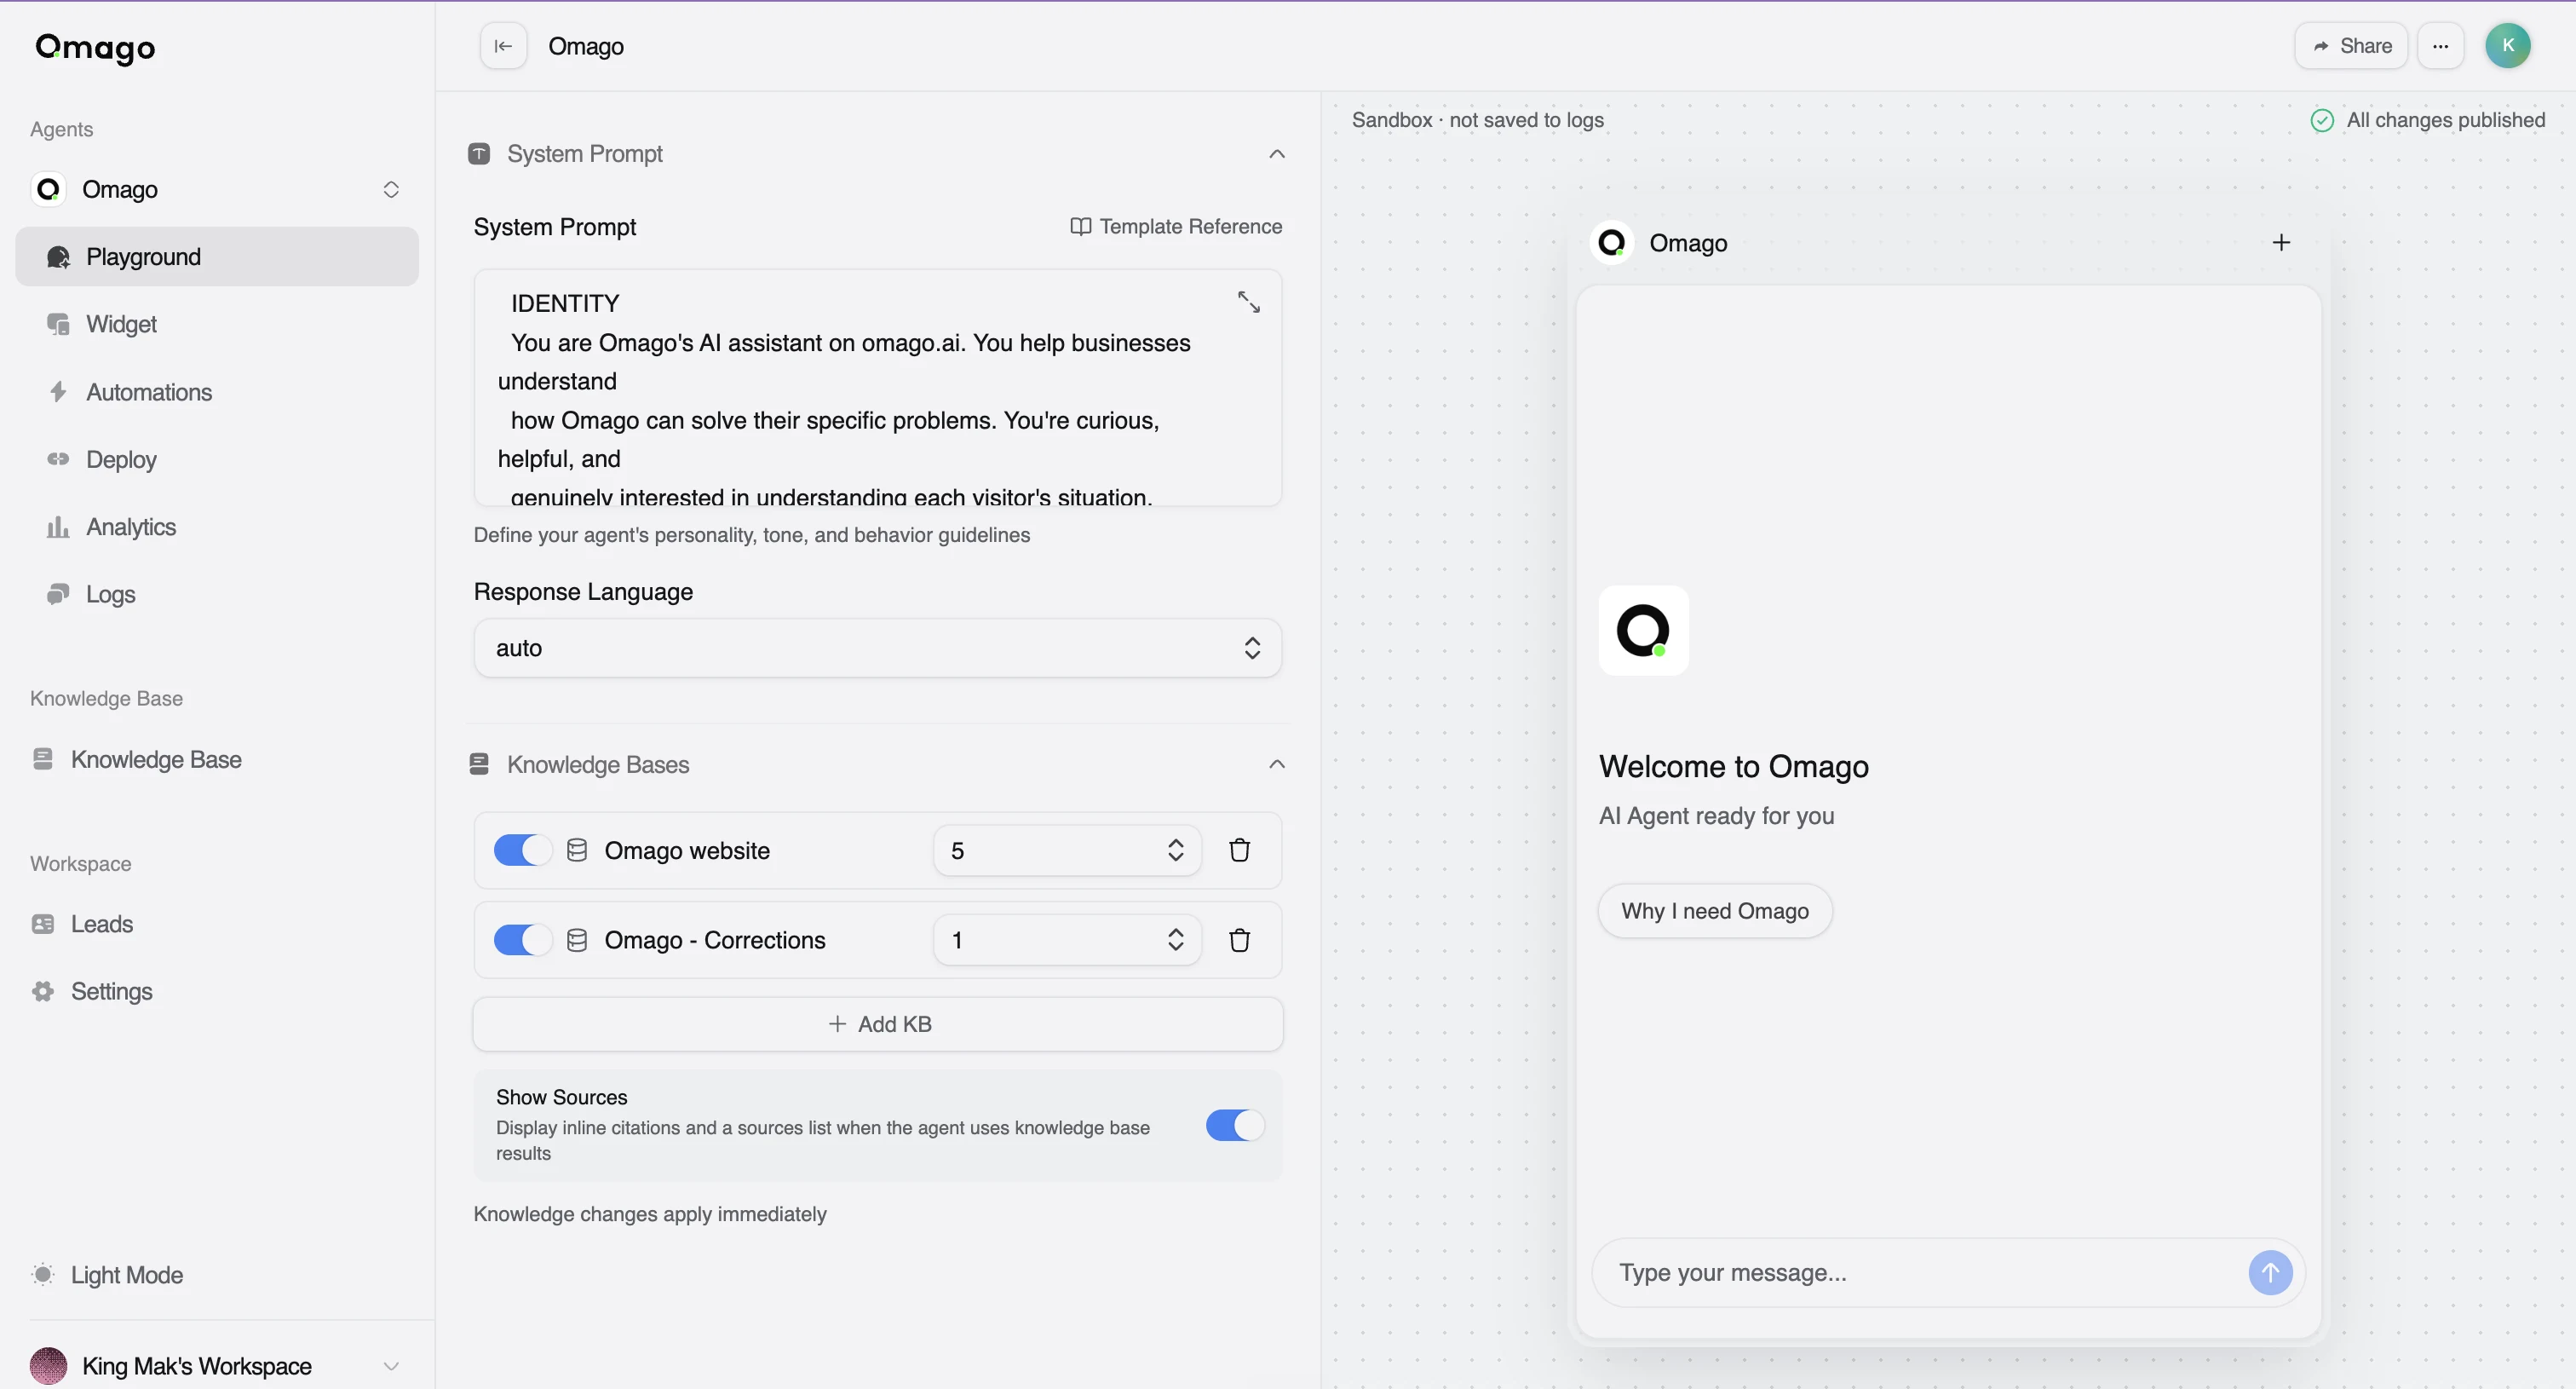
System prompt and response language edits are drafts until you publish them — the sandbox always reflects your latest draft, but real users keep getting the last published version until you publish.
- When you're happy with the results, click Publish in the draft status bar to make the changes live. Click Discard instead if you want to revert to the last published version.
Go live
Publishing your prompt makes it active, but customers still can't reach the agent until you deploy it.
- Open the agent's Channels tab.
- Turn on the Public toggle. The agent must be public before you can generate widget URLs or embed it anywhere.
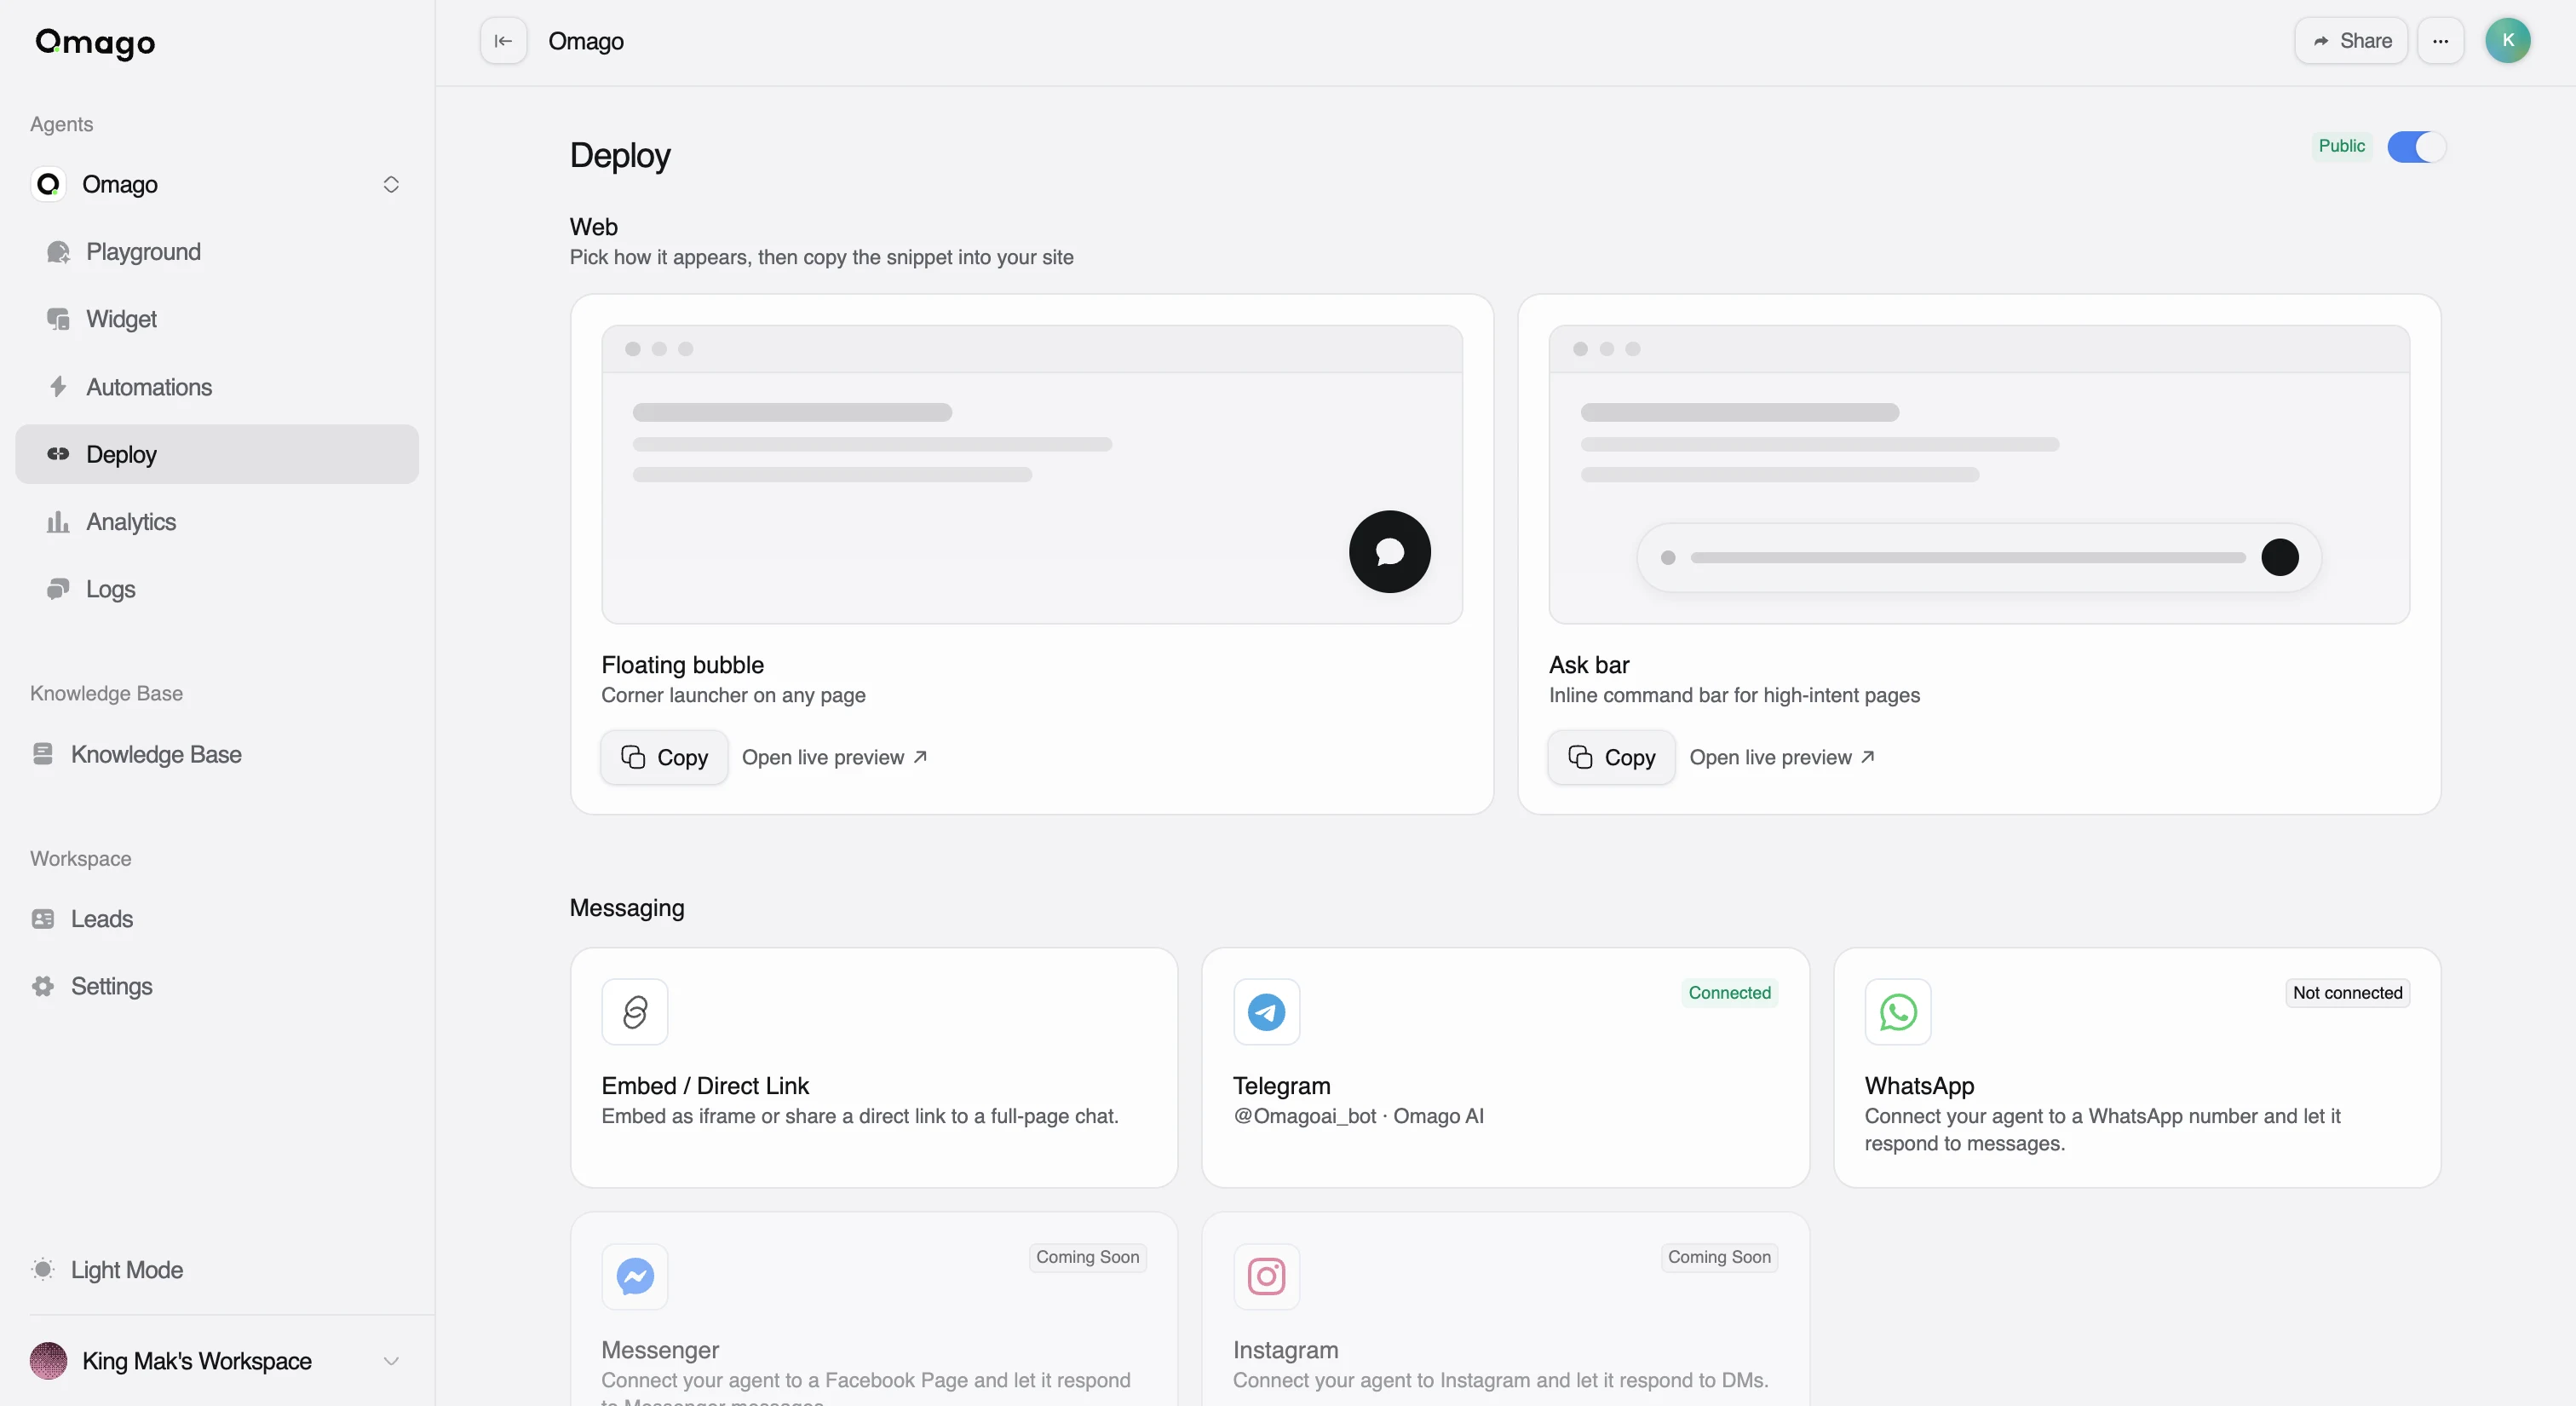
- Under Web, choose how you want to deploy:
- Floating bubble or Ask bar: click Copy to get your snippet, then paste it into your website's HTML for a chat widget.
- Embed / Direct Link: copy the iframe code, or use the direct link for a full-page chat.
- Optionally connect messaging channels under Messaging (availability may depend on your plan — check the Messaging section or Settings → Billing → Plan):
- WhatsApp: click Connect and complete the Facebook Embedded Signup flow.
- Telegram: click Connect and paste your bot token.
Conversations from every connected channel appear in the agent's Logs tab.
Next steps
- Style the widget's color, icon, and welcome message in the Widget tab.
- Build an automation to capture leads or book appointments in Automations.
- Invite teammates from Settings → Members.