Billing & team
Manage your plan, usage, and limits, and invite teammates with the right roles.
Your workspace's plan controls how many messages, agents, team members, and how much knowledge base storage you get. This page covers checking usage, changing plans, buying add-ons, inviting teammates, and managing workspace-level settings.
Check your plan, usage, and limits
- Click Settings in the left sidebar.
- Open the Billing tab, then the Plan sub-tab.
- Review your current plan name, status, billing cycle, and next billing date.
- Check the Usage meters for messages, agents, team members, and training data (knowledge base storage) used against your plan's limits.
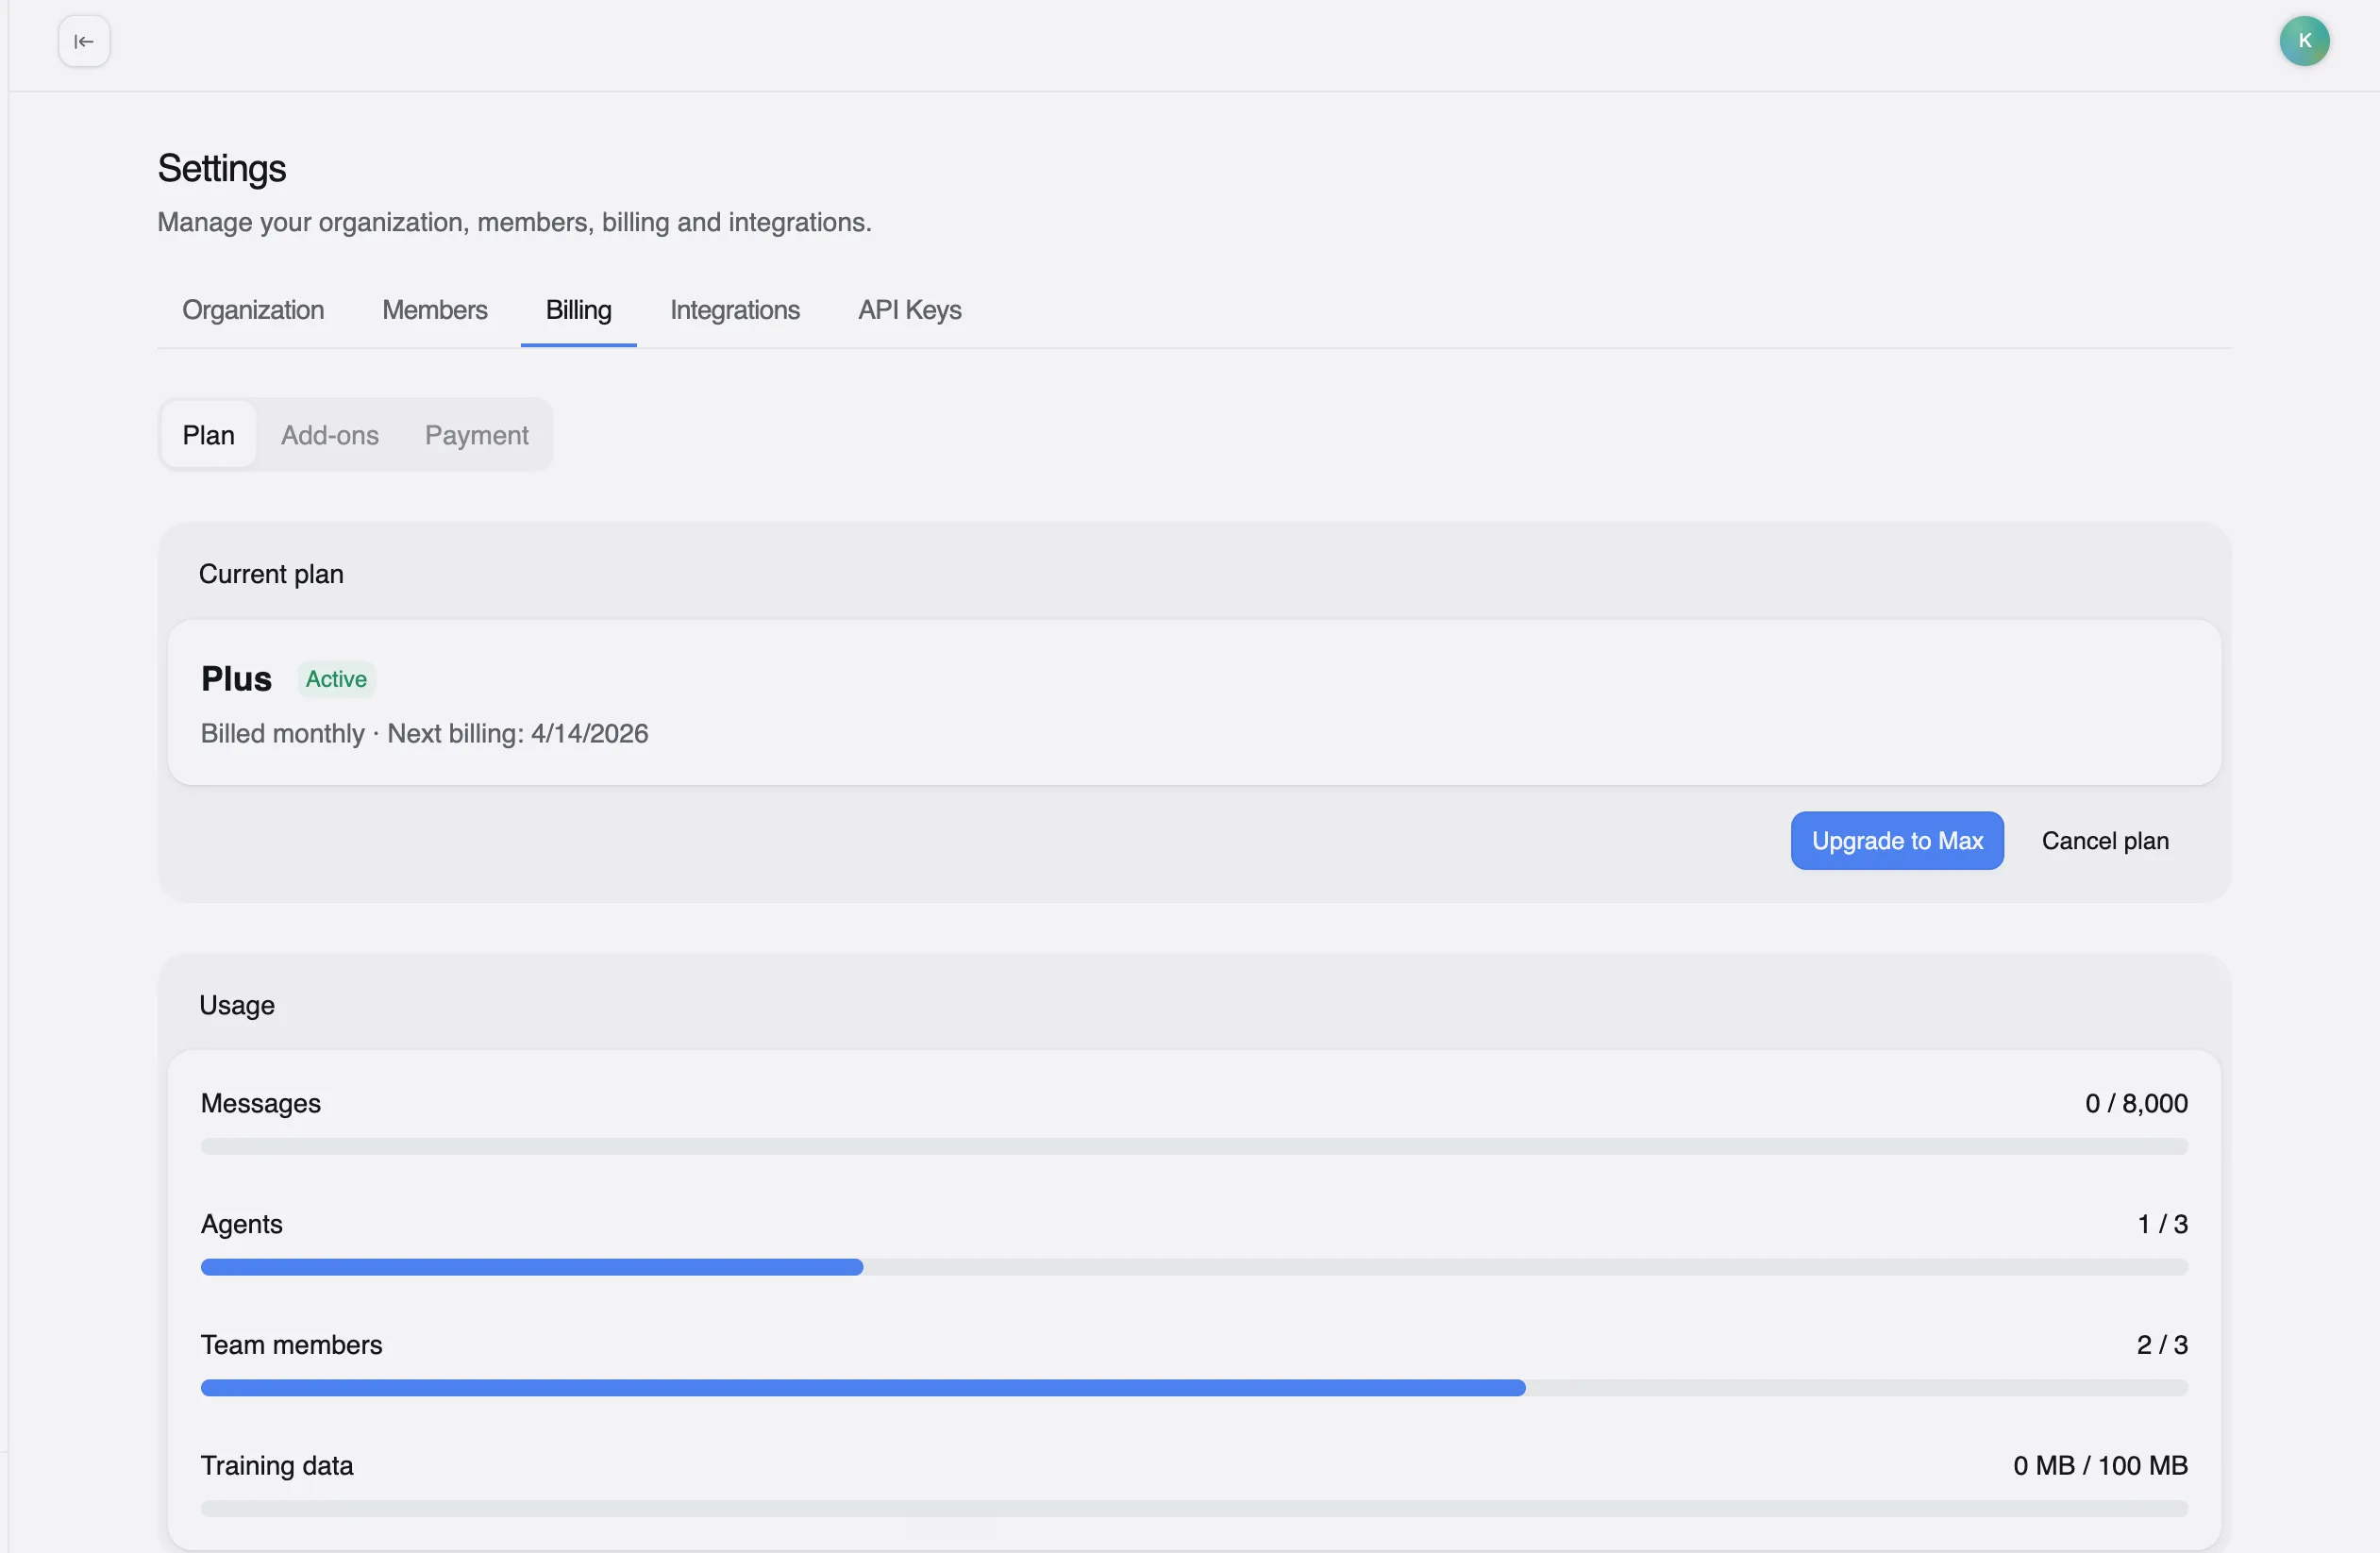
Message usage resets each billing period. Agents, team members, and storage are ongoing counts — they don't reset.
Plan limits at a glance
Omago has five plans, from lowest to highest: Starter, Core, Plus, Max, and Enterprise. Each higher tier raises your message allowance, number of agents, team members, and knowledge base storage. For example, Plus includes 8,000 messages/mo, 3 agents, 3 team members, and 100 MB of training data, while Max includes 25,000 messages/mo, 30 agents, 10 team members, and 500 MB of training data.
For current pricing and the full breakdown across every plan, go to Settings → Billing → Plan — your plan's limits are shown there alongside your usage.
Billing is processed by Stripe. Storage is counted across all knowledge bases in your workspace, not per agent.
If you're on your plan's message limit, you're notified as you approach it. At the limit, your agents stop responding until you buy extra conversations or upgrade.
Upgrade, downgrade, or cancel your plan
- Go to Settings → Billing → Plan.
- Use the plan action buttons — for example Downgrade to Plus or Cancel plan.
- Confirm the change.
Upgrades and downgrades take effect at the start of your next billing cycle. If you downgrade to a plan with lower limits than what you're currently using — for example, more agents or more storage than the new plan allows — check Settings → Billing → Plan for how your account is affected before confirming.
Buy add-ons
Add-ons raise a specific limit without moving you to a higher plan tier.
- Go to Settings → Billing → Add-ons (or open the direct link to the Add-ons sub-tab).
- Choose an add-on and complete the purchase.
| Add-on | What it does |
|---|---|
| Extra conversations | Raises your monthly message allowance |
| Extra agents | Adds one AI agent beyond your plan's cap |
| Remove branding | Unlocks the toggle to hide "Powered by Omago" on your chat widget (included free on Enterprise) |
See current add-on pricing on Settings → Billing → Add-ons.
To finish removing the badge after buying Remove branding, go to your agent's Widget tab and turn off Show "Powered by" — that toggle stays locked until the add-on is purchased.
If a single limit is blocking you but a full plan upgrade doesn't make sense, you can also ask Omago support to raise it individually.
Manage your payment method
- Go to Settings → Billing → Payment.
- Update your payment method and billing details.
Omago accepts all major credit cards. Enterprise plans can be invoiced.
Invite a teammate
- Click Settings in the left sidebar, then open the Members tab.
- Click Invite Member.
- Enter their email address and pick a role — Viewer, Member, or Admin (default is Member).
- Click Send Invitation.
The invite appears under the Invitations tab until the person accepts — it doesn't count as an active member until then.
What the roles mean
| Role | Access |
|---|---|
| Owner | Created the workspace. Full access. |
| Admin | Full access. |
| Member | Can edit. |
| Viewer | View-only. |
Team member count is limited by your plan (see the table above). If you're at your limit, upgrade your plan or free up a seat before inviting someone new.
Rename your workspace or change its logo
- Go to Settings → Organization.
- Under General Information, edit the Organization Name.
- Optionally upload a Logo — PNG, JPEG, GIF, WebP, or SVG, up to 5 MB.
- Click Save Changes.
Nothing is saved until you click Save Changes. This logo is your workspace-level logo, separate from an individual agent's widget icon or avatar, which is set in that agent's Widget tab.
Delete your workspace
- Go to Settings → Organization → Danger Zone.
- Click Delete Organization.
- Confirm the deletion.
This permanently removes the entire workspace — agents, knowledge bases, leads, members, and billing data. It cannot be undone.