Flows & automations
Automate what happens in a conversation — triggers, steps, hand-off to a human, and in-chat booking or payment.
A flow is a visual, deterministic script that runs on top of your agent's AI — for lead capture, qualification, support hand-offs, bookings, payments, and integrations. Flows remember answers across turns, pause and resume around off-topic messages, and run alongside your agent's normal AI replies.
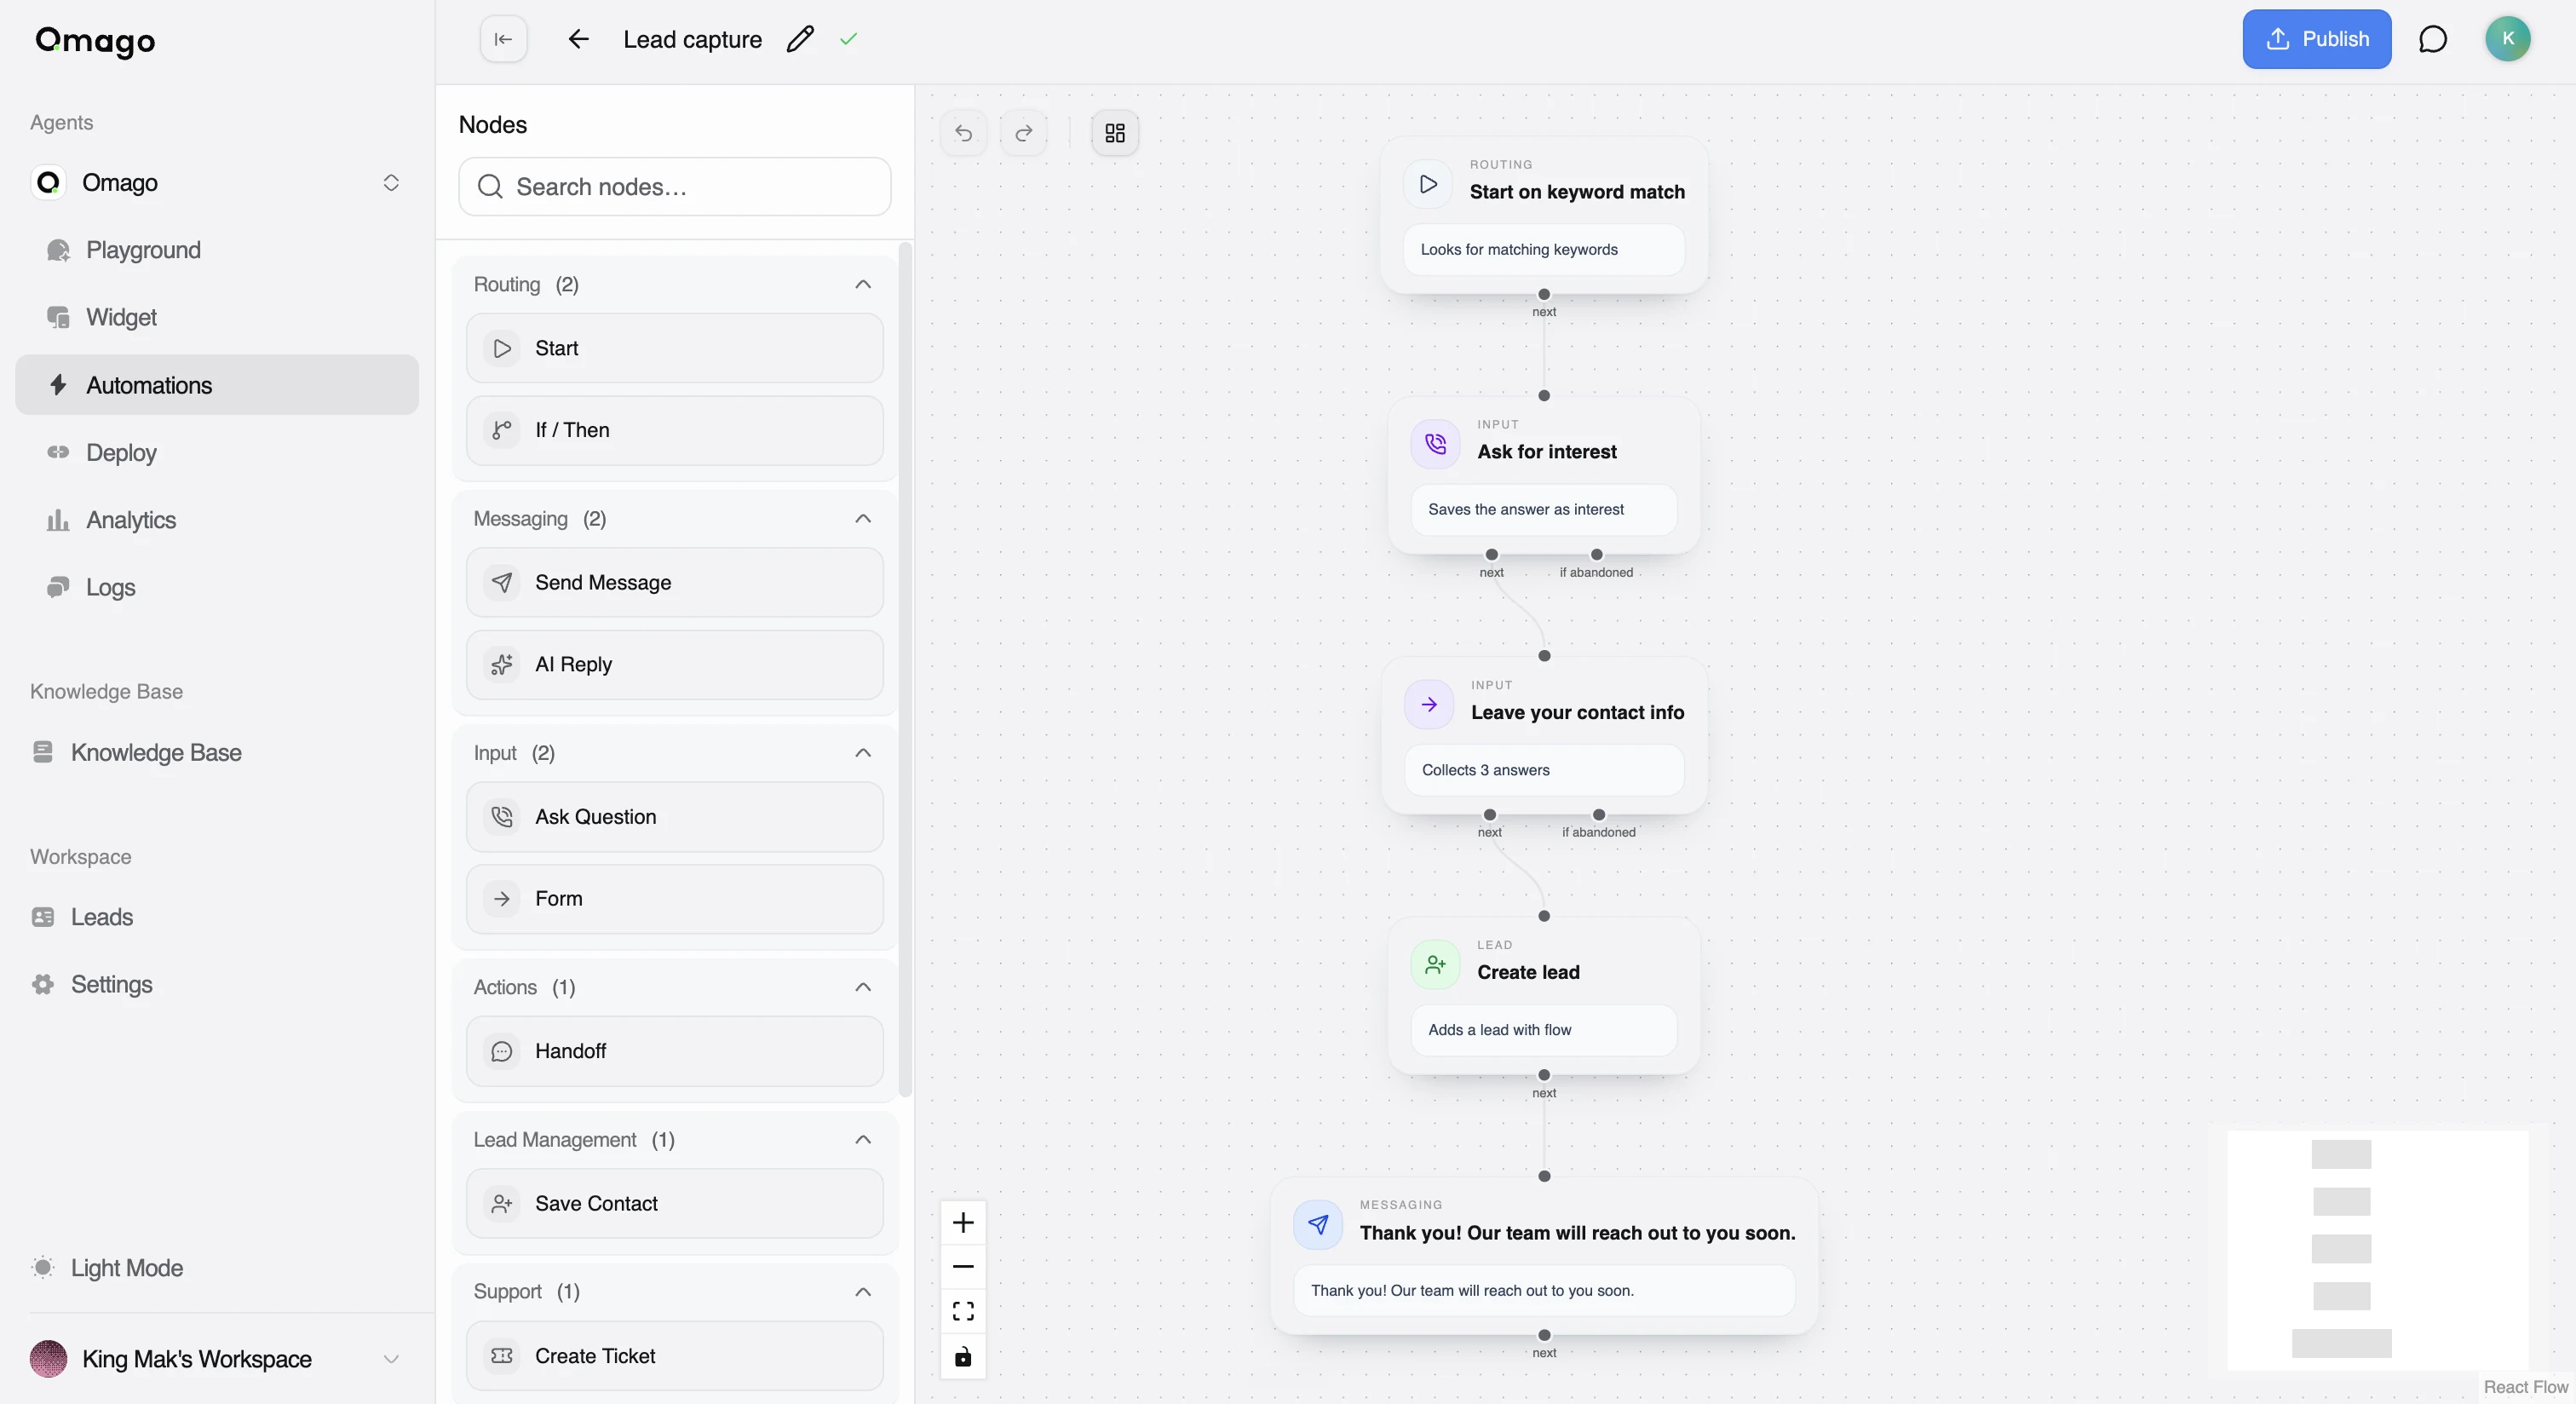
Where to build a flow
- Open the agent → Automations.
- The Automations list shows your flows for this agent. Click one to open its editor, or create a new flow.
- In the editor, drag nodes from the palette and connect them to build your logic.
How a flow starts
Every flow begins with a Start node that defines when it fires. When a message comes in, a router checks it against every active flow's Start trigger; if more than one flow could match, the one with the higher priority is checked first, and the first match wins.
Start triggers support four modes:
| Mode | Behavior |
|---|---|
| Keyword | Fires on a case-insensitive substring match against a list of keywords |
| Regex | Fires when the message matches one of your regex patterns |
| AI decides | An LLM scores the message against a prompt you write, and fires once it's confident enough that the message matches |
| Always | Fires on any message, as long as the flow is active |
How a flow runs
Once a conversation enters a flow, the runtime walks through the connected nodes step by step, following the output of each node to the next one.
- Questions pause the flow. Nodes that ask the customer something (like Ask Question or Form) stop and wait for their reply before continuing.
- Answers are remembered. Whatever the customer provides is stored and can be reused later in the flow — for example, in a message or a webhook.
- Customers can go off-topic. If someone asks something unrelated mid-flow, the agent can still answer with normal AI chat; the flow itself is paused and the customer can pick it up again or start a different one.
- Actions don't double-fire. If a step runs an action (like sending a webhook or creating a lead), re-running that step won't repeat the action.
There's a cap on how many steps a flow can take in a single turn, so a flow can't loop forever on one message.
Draft vs published — edits aren't live until you publish
Every flow has two versions:
- Draft — what you see and edit in the flow editor. The draft is never run for real customers.
- Published — the version that actually runs in live conversations.
When you click Publish, Omago checks that your flow is valid (it needs a Start node, valid node settings, and properly connected paths) and creates a new published version. If validation fails, publish is blocked and your draft stays editable so you can fix it.
This is the most common flow issue: editing a flow and not seeing the change in live chat. The router only ever tests the published version — after every edit, you need to publish again, even for small changes.
Building blocks: nodes
Flows are built from nodes you connect on the canvas. Each node does one job and passes control to the next node through an output port. Common ones you'll use in most flows:
- Start — defines the trigger that opens the flow.
- Send Message — sends a message to the customer, which can include earlier answers.
- Ask Question / Form — collects information from the customer and pauses until they respond.
- Save Contact — creates or updates a lead from the information collected so far.
- Handoff — routes the customer to a human (see below).
- Payment Link / Booking Link — lets the customer pay or book without leaving the chat (see below).
There are more node types beyond this list, covering branching logic, AI-generated replies, support tickets, webhooks, and CRM sync — open the node palette in the flow editor to see the full set, grouped by category (Routing, Messaging, Input, Actions, Lead Management, Support).
Handing a conversation off to a human
Add a Handoff node where you want the flow to route the customer to a person. It generates a WhatsApp deep-link or a link card the customer can click to reach a human directly.
This is not a live in-app takeover — nobody is silently listening in or can jump into the existing chat thread. It hands the customer a way to start a conversation with a person on WhatsApp or another link you configure.
Input nodes (Ask Question, Form) also route to their handoff path automatically if the customer doesn't answer after several attempts, so you should always design a handoff (or another way out) for anyone who gets stuck.
Letting customers pay or book inside the chat
- Connect the relevant integration first: Stripe for payments, or your booking provider (Calendly or Cal.com) for scheduling. Do this under Settings → Integrations.
- In your flow, add a Payment Link node to generate a payment URL, or a Booking Link node to generate a scheduling link pre-filled with the customer's details.
- Publish the flow — like any other change, this won't reach live chat until you do.
Both nodes hand the customer a link or card to complete the action; if the request fails (for example, the integration isn't connected), the flow can route down a separate error path instead of treating it as a success.
Next steps
- Explore the full node palette in the flow editor to see every available node type.
- Connect Stripe, booking, and CRM providers in Settings → Integrations.
- Review captured leads in the Leads tab.